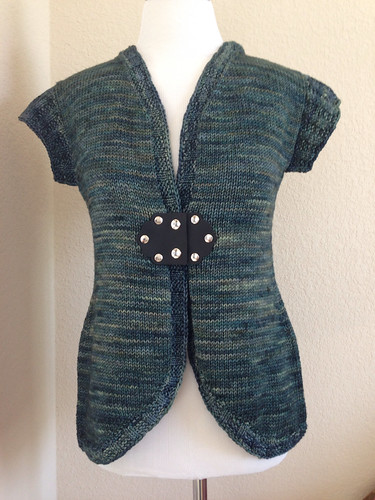
I’ve finished, blocked, and added the clasp to my
Camp Loopy 2014 Project 2! This was the
Storyteller Hoodie Pattern that I worked exactly like the pattern called for, except I didn’t work buttonholes on the front band. I used the
Jul Venetian Hinge in black instead. I’m thrilled with how this came out and I can’t wait for the temperature to drop this fall so I can wear it with jeans!
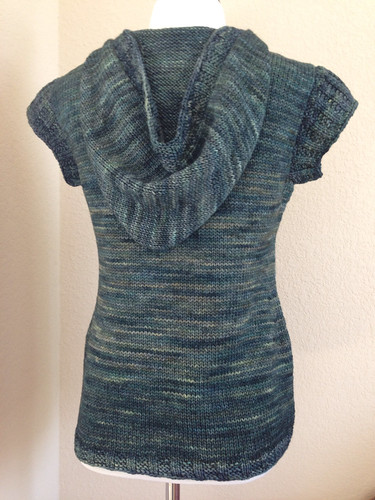
Here’s a back view so you can see how the hood hangs. Fun Fact: a top or jacket with a hood draws the eye upwards to the hood and distracts from your butt. I know a lot of people don’t want to knit hoods because they never wear them up. I don’t ever wear them up either but they’re cute and they do that smoke and mirrors distraction thing so I love them. See? I bet you didn’t even notice Fifi’s butt!
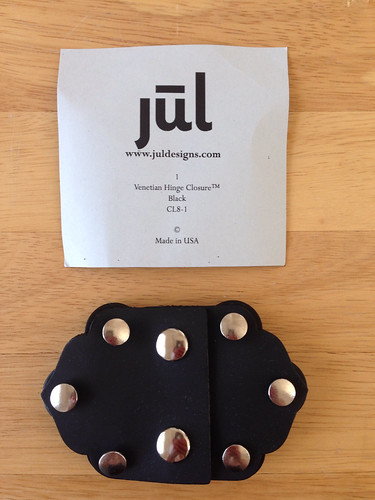
Since this was the first time I’ve used a clasp like this, I thought I’d show you how it works. I will definitely be using this (and some of the other styles) again. It comes in a bag, fully assembled but with no directions. (It’s pretty self explanatory and I didn’t feel like it needed directions.) The leather of the clasp is soft, with no rough edges, but it has enough body to hold its shape. Above, you can see the front view.
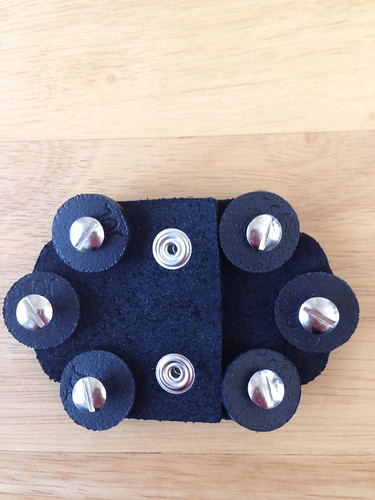
Here’s what it looks like from the backside. The leather washers that are included are a thicker leather than what’s used in the clasp, but they are still finished nicely with no rough edges or corners that might snag yarn. As you can see, the thing is attached with screws, so you’ll need a standard screwdriver to install it. You can also see the backside of the screws in the center of this photo.
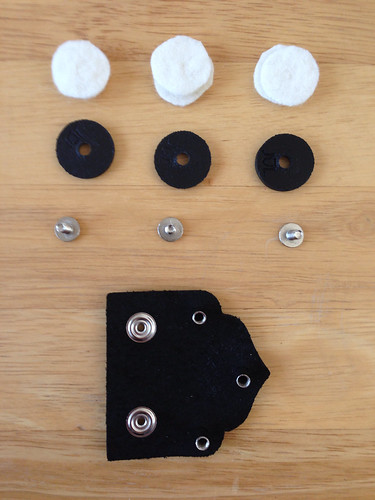
In looking at the clasp, it seemed like the screw shafts were a bit long for my yarn and there would be a little bit of “play” between the clasp and the washers. A wiggly clasp seemed like a recipe for pilling and needless wear and tear on my project, so I cut some additional washers from some wool felt I had. I used off white because that’s what I had. I just cut around the original leather washer and then cut an X in the center. I cut two felt washers for each screw since I wanted to eliminate wiggle room. You can see the felt washers, the leather washers and the screws with one half of the clasp in the picture above.

I had tried on the vest before I started to decide where to place the clasp, and marked the top edge with safety pins. This made it easy to place each half of the clasp and gently wiggle the screw shafts between the stitches. You can see the back side of the vest above, with the screw shafts poked through from front to back. It was very easy to shift the stitches around the shafts so there was no damage to the yarn. Also the shafts are polished smooth on the outside, so there’s nothing that will catch the yarn. The shafts will completely contain the screws themselves so the yarn can’t get snagged on the screws. I think the design is very well thought out and the finishing of each of the pieces is well done.
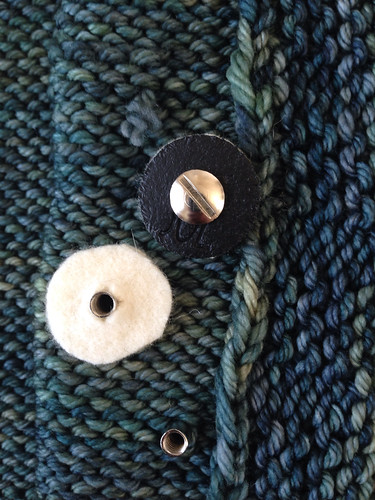
The next step is to place the two felt washers and the leather washer over the shaft and then close the whole thing with the screw. The two felt washers took up all the remaining space so once everything was reassembled, there was no play or wiggliness. (This is the most accurate photo color wise of the yarn, in case you’re curious.)
It was very easy to assemble the clasp and once it was all attached, it hangs nicely without pulling or drooping. The screws might be a bit long (which is why I added the felt washers), but if they were shorter, I might worry about them unscrewing and coming out. I’d rather have to add the washers and know that if the screws loosen, I’ll be able catch them and re-tighten them before they come all the way out. I wouldn’t use this type of clasp on any project lighter than DK weight because while the clasp isn’t particularly heavy, it does have some weight to it. I also wouldn’t use it on anything knit at a really loose gauge for the same reason. When I wash the vest, I’ll remove the clasp and reattach it when the vest is dried and blocked. I will also be using more of these and
the other designs on future projects. I love the look of it on the finished project.
Labels: Camp Loopy 2014, Vest


1 Comments:
This might be just what I'm looking for to finish my daughter's Tauriel. Thanks for showing us how it works.
~~Mary~~
Post a Comment
<< Home